Mini Projects

Create own flash cards video using Python

Build your own study flash cards video (+ background music) using Python easily.

Required Modules

  1. moviepy
  2. ImageMagick — for creating text clip
  3. pandas — optional for managing CSV file

Basic steps

  1. Read in the text information. Pandas can be used to read in a .csv file for table manipulation.
  2. create a Textclip object for each text and append all Textclips together
  3. Add in an audio if desired.  Allow the audio to loop through duration of the clip
  4. Save the file as mp4.

Sample Python Project — Vocabulary flash cards

Below is a simple project to create a vocabulary list of common words use in GMAT etc. For each word and meaning pair, it will flash the word followed by its meaning . There is slight pause in the timing to allow some time for the user to recall on the meaning for the particular words

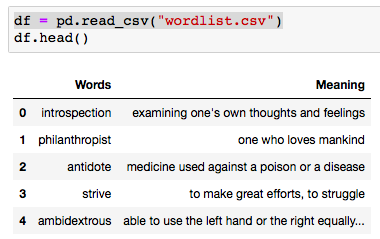
Sample table for wordlist.csv (which essentially is a table of words and their respective meanings) * random sample (subset) obtained from web

Screen Shot 2019-07-23 at 11.32.42 PM


def create_txtclip(tgt_txt, duration = 2, fontsize = 18):
    try:
        txt_clip = TextClip(tgt_txt, fontsize = fontsize, color = 'black',bg_color='white', size=(426,240)).set_duration(duration)
        clip_list.append(txt_clip)
    except UnicodeEncodeError:
        txt_clip = TextClip("Issue with text", fontsize = fontsize, color = 'white').set_duration(2)
        clip_list.append(txt_clip)

from moviepy.editor import *

df = pd.read_csv("wordlist.csv")
for word, meaning in zip(df.iloc[:,0], df.iloc[:,1]):
    create_txtclip(word,1, 70)
    create_txtclip(meaning,3)

final_clip = concatenate(clip_list, method = "compose")

# optional music background with loop
music = AudioFileClip("your_audiofile.mp3")
audio = afx.audio_loop( music, duration=final_clip.duration)

final_clip = final_clip.set_audio(audio)

final_clip.write_videofile("flash_cards.mp4", fps = 24, codec = 'mpeg4')<span id="mce_SELREST_start" style="overflow:hidden;line-height:0;"></span>

In some cases, the audio for the flash cards does not work when play with Quicktime, will work on VLC

Sample video (converted to gif)

ezgif.com-video-to-gif

PDF manipulation with Python

This post covers basic PDF manipulation for daily tasks using simple Python modules.

  1. Merging mulitple PDF
  2. Extract text from PDF
  3. Extract image from PDF

Merging PDF

from PyPDF2 import PdfFileMerger
pdfs = ['a.pdf', b.pdf]
merger = PdfFileMerger()

for pdf in pdfs:
    merger.append(pdf)

merger.write("output.pdf")

Extract text from PDF

import pdftotext

# Load your PDF
with open("Target.pdf", "rb") as f:
    pdf = pdftotext.PDF(f)

# Save all text to a txt file.
with open('output.txt', 'w') as f:
    f.write("\n\n".join(pdf))

More information from “Convert PDF pages to text with python

Extract Image (JPEG) from PDF


import os
import tempfile
from pdf2image import convert_from_path

filename = 'target.pdf'

with tempfile.TemporaryDirectory() as path:
     images_from_path = convert_from_path(filename, output_folder=path, last_page=1, first_page =0)

base_filename  =  os.path.splitext(os.path.basename(filename))[0] + '.jpg'      

save_dir = 'your_saved_dir'

for page in images_from_path:
    page.save(os.path.join(save_dir, base_filename), 'JPEG')

More information from “Convert PDF pages to JPEG with python

Running R on Jupyter Notebook with R Kernel (No Anaconda)

A simple guide to install R Kernel on Jupyter Notebook (Windows).  Do not need Anaconda.

  1. Objectives:
      1. Install R Kernel on Jupyter Notebook (Windows)
  2. Required Tools:
      1. R for windows— R for windows
      2. JupyterNotebook — Jupyter Notebook
  3. Steps:
      1. Install R. Use the R terminal (do not use R studio) to install R packages:
        • install.packages(c(‘repr’, ‘IRdisplay’, ‘evaluate’, ‘crayon’, ‘pbdZMQ’, ‘devtools’, ‘uuid’, ‘digest’))
        • install.packages(‘IRkernel’)
      2. Make Kernel available to Jupyter
        • IRkernel::installspec()
        • OR IRkernel::installspec(user = FALSE) #install system-wide
      3. Open a notebook and open new R script.

Further notes 

  • After getting Additional R library might be hard to install inside the Notebook. For workaround, install desired library in R terminal then open the Notebook.
  • If need to use R.exe on windows command terminal, ensure R.exe is on path. [likely location: C:\R\R-2.15.1\bin]
  • ggplot tutorial

References:

Retrieving Stock statistics from Yahoo Finance using python

For this post, we are only going to scrape the “Key Statistics” page of a particular stock in Yahoo Finance. The usual way might be to use Requests and BeautifulSoup to parse the web page. However, with the table format in the targeted webpage, it is easier to use Pandas read_html and DataFrame function.

  1. Objectives:
      1. Retrieving stocks information (Key statistics) from Yahoo Finance.
  2. Required Tools:
      1. Python Pandas—  Using Pandas read_html function for reading web table form.

Usage — Pulling a particular stock data data

import pandas as pd

tgt_website = r'https://sg.finance.yahoo.com/quote/WDC/key-statistics?p=WDC'

def get_key_stats(tgt_website):

    # The web page is make up of several html table. By calling read_html function.
    # all the tables are retrieved in dataframe format.
    # Next is to append all the table and transpose it to give a nice one row data.
    df_list = pd.read_html(tgt_website)
    result_df = df_list[0]

    for df in df_list[1:]:
        result_df = result_df.append(df)

    # The data is in column format.
    # Transpose the result to make all data in single row
    return result_df.set_index(0).T

# Save the result to csv
result_df = get_key_stats(tgt_website)

Pulling all the stocks symbols

Here, we are pulling one known stock symbol. To get all the stocks in particular indices, the stock symbols need to be known first. The below code will extract all the stock symbols, along with other data, from the NASDAQ website. [Note: the NASDAQ website has changed format and the original method of getting the stock symbols is not valid. Please see the 2nd method to pull from eoddata website]

import pandas as pd

weblink = 'https://www.nasdaq.com/screening/companies-by-name.aspx?letter=A&render=download'
sym_df = pd.read_csv(weblink)
stock_symbol_list = sym_df.Symbol.tolist()

import string
import time
import pandas as pd

url_template = 'http://eoddata.com/stocklist/NASDAQ/{}.htm'

sym_df = pd.DataFrame()
for letter in list(string.ascii_uppercase):
    tempurl = url_template.format(letter)
    temp_data = pd.read_html(tempurl)
    temp_df = temp_data[4]
    if len(sym_df)==0:
        sym_df = temp_df
    else:
        sym_df = sym_df.append(temp_df)
    time.sleep(1)
stock_symbol_list = sym_df.Code.tolist()

Pulling key statistics for all stock symbols (for given index)

The last step will be to iterate all the symbols and get the corresponding key statistcis

all_result_df = pd.DataFrame()
url_prefix = 'https://sg.finance.yahoo.com/quote/{0}/key-statistics?p={0}'
for sym in stock_symbol_list:
    stock_url = url_prefix.format(sym)
    result_df = get_key_stats(stock_url)
    if len(all_result_df) ==0:
        all_result_df = result_df
    else:
        all_result_df = all_result_df.append(result_df)

# Save all results
all_result_df.to_csv('results.csv', index =False)

Downloading YouTube Videos and converting to MP3

A simple guide to download videos from YouTube using python

  1. Objectives:
      1. Download YouTube Videos
      2. Saving as subclip (saving a portion of the video)
      3. Converting to MP3
      4.  
  2. Required Tools:
      1. PyTube— primarily for downloading youtube videos.
      2. MoviePy — for video editing and also convert to mp3.
      3.  
  3. Steps:
    1. pip install pytube and moviepy

Basic Usage

from pytube import YouTube
from moviepy.editor import *

# download a file from youtube
youtube_link = 'https://www.youtube.com/watch?v=yourtubevideos'
w = YouTube(youtube_link).streams.first()
w.download(output_path="/your/target/directory")

# download a file with only audio, to save space
# if the final goal is to convert to mp3
youtube_link = 'https://www.youtube.com/watch?v=targetyoutubevideos'
y = YouTube(youtube_link)
t = y.streams.filter(only_audio=True).all()
t[0].download(output_path="/your/target/directory")

Downloading videos from a YouTube playlist

import requests
import re
from bs4 import BeautifulSoup

website = 'https://www.youtube.com/playlist?list=yourfavouriteplaylist'
r= requests.get(website)
soup = BeautifulSoup(r.text)

tgt_list = [a['href'] for a in soup.find_all('a', href=True)]
tgt_list = [n for n in tgt_list if re.search('watch',n)]

unique_list= []
for n in tgt_list:
    if n not in unique_list:
        unique_list.append(n)

# all the videos link in a playlist
unique_list = ['https://www.youtube.com' + n for n in unique_list]

for link in unique_list:
    print(link)
    y = YouTube(link)
    t = y.streams.all()
    t[0].download(output_path="/your/target/directory")

Converting from MP4 to MP3 (from a folder with mp4 files)

import moviepy.editor as mp
import re
tgt_folder = "/folder/contains/your/mp4"

for file in [n for n in os.listdir(tgt_folder) if re.search('mp4',n)]:
full_path = os.path.join(tgt_folder, file)
output_path = os.path.join(tgt_folder, os.path.splitext(file)[0] + '.mp3')
clip = mp.AudioFileClip(full_path).subclip(10,) # disable if do not want any clipping
clip.write_audiofile(output_path)

Hosting static website with GitHub Pages

Create static website with custom domain names. Perks is having your own web hosting at minimal cost. The only cost is the cost of the custom domain name.

Requirements:

  1. Github account: For hosting the static website.
  2. Custom domain name: Purchase domain names from GoDaddy or Namecheap etc. Alternatively, can use GitHub default url <username>.github.io

Steps:

  1. Github
    1. Create new repository with following format <username>.github.io where username refers to GitHub userid.
    2. In the repository, go to setting: Under Theme, choose a Jekyll theme. When finish, click on Source, select master branch. A file needs to exist in repository before Source option can be selected.
    3. If you have purchase your custom domain, you need to configure the A records and CNAME for the domain at the registrar to point to the GitHub site. Proceed to make the necessary changes at the domain registrar website.
  2. Registrar (Below is using GoDaddy as example)
    1. Under My Products, select the domain name that will be used. Click on Manage button.
    2. Once in setting page, scroll down to Additional Settings and click Manage DNS
    3. Within the DNS management page, Add in 4 “A” row with each pointing to IP as follows:
      1. 185.199.108.153
      2. 185.199.109.153
      3. 185.199.110.153
      4. 185.199.111.153
    4. Add in the CNAME pointing to your repository at Github: <username>.github.io
    5. View link for more info on configuring domain name with goDaddy
    6. Similarly, see following link for Namecheap
    7. Note: if you setup using A records and CNAME, leave the nameservers as default.
    8. Once the settings are configured, return to GitHub pages to add the custom domain name
  3. Github
    1. At the setting page, add the custom domain name in the Custom Domain section.
    2. Tick Enforce Https (may take up to 24 hours to take effect)
    3. Completed.
  4. Proceed to add in contents in GitHub using markdown.

Resources

Notes

  • GoDaddy default A records: 50.63.202.32


Convert PDF pages to text with python

A simple guide to text from PDF. This is an extension of the Convert PDF pages to JPEG with python post

  1. Objectives:
      1. Extract text from PDF
  2. Required Tools:
      1. Poppler for windows— Poppler is a PDF rendering library . Include the pdftoppm utility
      2. Poppler for Mac — If HomeBrew already installed, can use brew install Poppler
      3. pdftotext— Python module. Wraps the poppler pdftotext utility to convert PDF to text.
  3. Steps:
      1. Install Poppler. For windows, Add “xxx/bin/” to env path
      2. pip install pdftotext

Usage (sample code from pdftotext github)

import pdftotext

# Load your PDF
with open("Target.pdf", "rb") as f:
    pdf = pdftotext.PDF(f)

# Save all text to a txt file.
with open('output.txt', 'w') as f:
    f.write("\n\n".join(pdf))

Further notes 

See also:

Convert PDF pages to JPEG with python

A simple guide to extract images (jpeg, png) from PDF.

  1. Objectives:
      1. Extract Images from PDF
  2. Required Tools:
      1. Poppler for windows— Poppler is a PDF rendering library . Include the pdftoppm utility
      2. Poppler for Mac — If HomeBrew already installed, can use brew install Poppler
      3. Pdf2image— Python module. Wraps the pdftoppm utility to convert PDF to a PIL Image object.
  3. Steps:
      1. Install Poppler. For windows, Add “xxx/bin/” to env path
      2. pip install pdf2image

Usage

import os
import tempfile
from pdf2image import convert_from_path

filename = 'target.pdf'

with tempfile.TemporaryDirectory() as path:
     images_from_path = convert_from_path(filename, output_folder=path, last_page=1, first_page =0)

base_filename  =  os.path.splitext(os.path.basename(filename))[0] + '.jpg'      

save_dir = 'your_saved_dir'

for page in images_from_path:
    page.save(os.path.join(save_dir, base_filename), 'JPEG')

Further notes 

Setup MongoDB on iOS

A simple guide to setting up MongoDB on iOS.

  1. Objectives:
      1. Install MongoDB on MacBook.
  2. Required Tools:
      1. Homebrew —  package manager for Mac
      2. MongoDB — MongoDB community version
      3. pymongo — python API for MongoDB.
  3. Steps (terminal command in blue):
      1. brew update
      2. brew install mongodb
      3. Create MongoDB Data directory (/data/db) with updated permission
        1. $ sudo mkdir -p /data/db
        2. $ sudo chown <user>/data/db
      4. Create/open bash_profile
        1. $ cd to users/<username>
        2. $ touch .bash_profile # skip if .bash_profile present
        3. $ open .bash_profile
      5. Insert command in  bash_profile for MongoDB commands to work in terminal
        1. export MONGO_PATH=/usr/local/mongodb
        2. export PATH=$PATH:$MONGO_PATH/bin
      6. Test: Run MongoDB
        1. terminal 1: mongod
        2. terminal 2: mongo.
      7. Install pymongo
        1. pip install pymongo

Further notes 

Fast Install Python Virtual Env in Windows

A simple guide to install virtual environment with different python version on Windows.

  1. Objectives:
      1. Install Virtual Environment on Windows
  2. Required Tools:
      1. Python —  Python 3 chosen in this case.
      2. VirtualEnv — Main virtualenv tool.
      3. VirtualEnvWrapper-Win — VirtualEnv Wrapper for Windows.
  3. Steps:
      1. Install python with python windows installer.
      2. Add python path to Windows PATH. Python 3 will enable this option for users. If not found, add the following two path (Python 3 sample default path )
        1. C:\Users\\AppData\Local\Programs\Python\Python36
        2. C:\Users\MyUserName\AppData\Local\Programs\Python\Python36\Scripts
      3. pip install virtualenv
      4. pip install virtualenvwrapper-win
      5. Main commands use with virtualenv wrapper in windows command prompt
        1. mkvirtualenv : create a new virtual env
        2. workon : list all the environment created
        3. workon  : Activate particular environment.
        4. deactivate: deactivate active environment
        5. rmvirtualenv : remove target environment.

Further notes 

  • Most of the guide reference from Timmy Reilly’s Blog.
  • To create virtualenv with specified python version
    • virtualenv -p <path/win dir of python version>
    • mkvirtualenv -p <path/win dir of python version>
  • Retrieve a list of python modules installed via pip and save to requirement.txt
    • pip freeze > requirement.txt
  • to install a list of required modules (from other virtual env etc)
    • pip install -r requirements.txt
  • Likely python3 pip path for win10: C:\Users\xxx\AppData\Local\Programs\Python\Python39\Scripts